GTA 6 Chapter 3 Walkthrough: Every Mission in Vice City
Updated November 21, 2026
On this page
- Welcome to Vice City
- Dealer's Choice
- Meet the Heders
- Dubious Provenance
- Mami Knows Best
- South Leonida Real Estate
- Tyrone
- Here, Kitty Kitty
- Car Service
- Top Billing
- Boobie Time
- First Impressions
- Caught Slipping
- Crosstown Traffic
- Credit Check
- Steal the Zorrusso for Randy
- Sinfrontera National Bank
- Security Expert
- Ride or Die
- Company Property
- The Missing Link
- Safe Word
- Cooties
- Bricked Up
- Hidden Charges
- The Cartel Heist
- What opens up afterwards
More in GTA 6 Guides
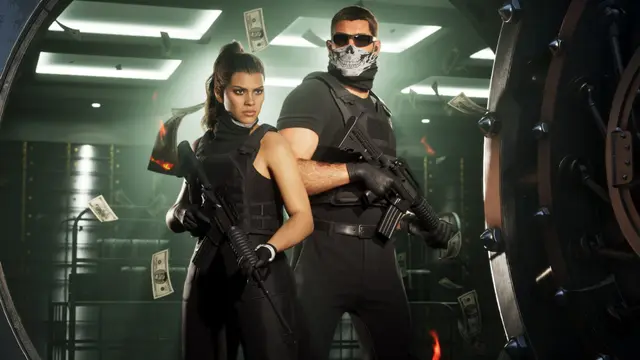
Chapter 3 of Grand Theft Auto VI moves Jason and Lucia into Vice City, sets them up in Boobie's Bayside apartment and builds up Raul's crew until The Cartel Heist at the Sinfrontera National Bank. Our database counts 26 story missions. We do not have a reliable play time for the chapter yet, so plan on several sessions.
Spoiler warning: mission names and steps below describe story events in Chapter 3.
Mission lists do not agree on order, because several missions unlock at the same time. We follow the order on our Chapter 3 page and note where a mission needs another one first. Nine missions are not yet backed by two full walkthroughs, so for those we only give the goal. Our story missions guide has every chapter, and the Chapter 2 walkthrough covers the run up to Vice City.
Welcome to Vice City
Starts: automatically after Checking Out, on the highway into Vice City. Jason calls Dre'Quan, who asks you to meet him at the Jack of Hearts strip club in Crosstown.
- Drive to the Jack of Hearts. The car stops outside by itself.
- Talk to the bouncer, then walk round to the other entrance where Dre'Quan comes out. Follow him through the club to the stairs.
- If you like, accept his cash and throw it at the dancers: focus on a dancer, then throw.
- Go back to Dre'Quan and follow him upstairs to meet Boobie, who lends you his apartment.
- Drive to the apartment and park in the covered spot. Your owned cars are kept here for the chapter.
- Walk to the front, go up to the second floor and enter the first door.
Unlocks: the Bayside apartment. Moses then texts that Pay 'n' Sprays can buy and register cars with Standard Trackers.
Dealer's Choice
Starts: as Jason at the Jack of Hearts. Dre'Quan is recording in the studio at the top of the stairs.
- Wait for him to finish, then follow him up to Boobie.
- Drive Dre'Quan to a nearby apartment and meet the dealer, Tyrone, on the second floor.
- Pick Cut or Pure product.
- Drive a short way south to the deal, hand over the bag and take back the backpack of money.
- A man stops you and claims the bag. He attacks whatever you say, so knock him out with your fists.
- Drive Dre'Quan to a shop in Southside. A cutscene ends the mission partway there.
The choice: Cut product gets noticed and you sell it at half price, Pure goes through cleanly. A peaceful deal gives a Professional bonus.
Meet the Heders
Starts: a day or two after Dealer's Choice, once Cal has looked at the hard drive at the apartment. Use the bag of clothes in the bedroom.
- Drive to the rooftop restaurant on the east side of the city and take the elevator up to Brian and Lori.
- Hand Lucia a drink from the bar. When the waiter comes, order the Surf and Turf she asks for, a small relationship boost.
- Talk to Brian at the railing, then switch to Lucia when prompted.
- Cross the bridge to the white van in the lot on the right and open its back doors for a disguise.
- Drive south to the dockyard and find the yellow SCOOP container on top of the middle stack. Cut it open with the cut-off tool.
- When a gang hauls the container away, chase it on a bike, jump onto the trailer and smash the car out backwards.
- Lose the police on the highway and drive into the lockup in the northwest corner of the city.
Tip: the first SCOOP container you can open holds a cigar and $600. Unlocks: both characters keep the cut-off tool for SCOOP containers around the map.
Dubious Provenance
Starts: from the bag in the apartment closet. Drive or take a RideMe to the antique store in Capri, on the far west of the map.
- Try the front door. Evelyn will not look at the statue, but her colleague Halifax offers to.
- Hand him the statue and take his Crowex Octane watch as collateral.
- Later, break into Evelyn Andrews Antiques through the back window above the air conditioner, let Jason in and check the desk drawer in the north corner.
- Find Halifax at the motel next door, in an upstairs room on the west side, and choose to trust him.
- When Evelyn gets in touch, go to the house she names in northwest Capri and chase Halifax by Seashark, on foot and by bike.
- When he hits Lucia's car, jump out, use Focus and shoot his leg. Walk up to him and call Jason.
Missable: if you refuse the statue handover, you get an optional call to make instead. Skip it and the later parts vanish at the end of the chapter. Reward: about $2,500 in jewelry and cash from the storage container, plus a '32 Hustler to keep or sell.
Mami Knows Best
Starts: as Lucia with her mother Mia in Peacock Bay.
- Drive Mia's car to her property for sale in Hamlet and follow her through the house.
- Help her up at the entrance, then throw the junk on the lawn into the blue dumpster.
- Pull the mattress out of the pool with her. Shoot the alligator that grabs her, quickly.
- After the M7 gang next door threatens you and leaves, take the excavator across the street and wreck their house and cars.
- Drive Mia back to her office.
South Leonida Real Estate
Goal: another Lucia mission with Mia. Some lists place it near the end of the chapter instead. The steps are not confirmed yet.
Tyrone
Some lists count meeting Tyrone in La Perle as its own mission; others fold it into Here, Kitty Kitty. The steps are not confirmed yet.
Here, Kitty Kitty
Starts: as Jason with Tyrone at an apartment complex in La Perle, after the first part of Dubious Provenance.
- Go to Charles's apartment in Rockridge.
- Pay the man at the door $20 in cash for a tip, or break in and read the Aline's Thrift Store receipt in the bedroom.
- Head to the homeless camp on the northwest edge of La Perle and break open the ground floor door.
- Chase Charles up the stairs. Punch any attackers rather than shooting them.
- When he goes over the wall at the top, go back down, search him and take the bag of Kitty Litter.
Car Service
Starts: as Lucia about a day after Meet the Heders, when Raul texts from a blocked number. Go to the marker in Salton.
- Grab the flash grenades and silenced pistol from the trunk of a nearby car.
- Climb the white van on the north side of the chop shop and walk the metal roof.
- Steal the Schafter V12 from the middle of the covered area, next to a small room.
- Get out before the police arrive, or lose them.
- Deliver it to Leonida Auto World in the far northwest of the city.
Hard part: staying hidden. Shots bring more gang members, and do not shoot the dog by the gate unless it attacks, because that hurts your criminal profile. Reward: $3,000, and Randy starts buying cars.
Top Billing
Starts: straight after Car Service, when Dre'Quan invites you to the Jack of Hearts.
- Meet him down the hallway to the right of the stairs.
- As Lucia, ask the host about the Real Dimez, then find Bae-Luxe and Roxy in the parking lot.
- Follow Roxy by car until a train cuts you off, then order food at Peewees.
- Drive to the house party south near the VCIA and go in the back door.
- Let the dog in the kitchen out into the yard so Jacki leaves her post.
- Knock out Kaamal when he stands up.
- As Jason, cut the power at the green box on the corner, then follow Roxy out as Lucia.
Boobie Time
Starts: as Jason with Boobie at the Jack of Hearts, after the first part of Dubious Provenance.
- Drive Boobie to two pickups south and southwest. Honk at the second and wait each time.
- Drive to the building by the river in the city center.
- When thieves grab the cash bag, chase them on a Seashark. They circle in a dead end, which makes them easy to hit.
- Ride over the bag, go back and drive Boobie to the smoke shop across the river.
Unlocks: Yasmani as a fence who pays more for jewelry and marked bills.
First Impressions
Starts: after Car Service, at the garage on Waxman Island. Enter 2404 on the wall panel.
- As Lucia, pick up Raul on the south side of Ocean Beach.
- As Jason, hold off the police while Lucia drives. After the crash, reverse out and keep going.
- Head for the Rialto Islands and jump the half raised bridge to shake the cops.
- Swap to the van in the marked lot and drop Raul in Bayside.
Tip: shoot tires, engines and legs to keep a Professional rating. Reward: $3,000.
Caught Slipping
Starts: automatically at the apartment door once Boobie Time and First Impressions are done.
- As Jason, chase a thief through the building site next door, use Focus to shoot his legs and search the bag.
- Do the same as Lucia with the second thief.
- Drive south to Big House Storage and follow Jason to the unit he bought.
Crosstown Traffic
Starts: as Lucia at the Courtyard Bar in Stockyard or as Jason at the boatyard in La Perle.
- As Jason, follow the boats by bike along the riverside dirt paths.
- As Lucia, run under the tracks to the next station, board the rear car and intimidate the Guardia brother until he makes the call.
- As Jason, clear the dock, follow the path right at the bridge and jump onto a boat. Shoot the nearer crew, then the gunner, and jump across.
- As Lucia, punch out the gang on the train and hit the emergency stop at the back.
- Defend the boat. The rear seats hold a rifle and armor, and ammo is unlimited. Shoot drivers first and the helicopter pilot through the windshield.
Reward: $3,000.
Credit Check
Starts: Raul calls after Crosstown Traffic. Use the intercom near the Vice Vinyl mod shop with both characters.
- Talk to Andrea, pick a pair of masks, talk to Karim and take the Dye Pack Jammer.
- Rob the Washington Beach bank: threaten the guards and empty four marked drawers.
- Rob a second branch alone, avoiding the first bank's search area. Get the safe code from the teller and blow the inner door.
- Rob a third branch further south, which has more guards. Park facing the road, take the marked bills from all four drawers and skip the safe.
- Split up to divide the police, regroup at the apartment and answer the door.
Reward: $6,000 and the Dye Pack Jammer for marked bills at banks and Payday Loans. See the money guide for how to use it.
Steal the Zorrusso for Randy
Starts: after Crosstown Traffic, at the walled garage of the Hathaway Apartments in Ocean Beach.
- Climb the wall and install the key cloner app on your phone.
- Find the car on the ground floor, east side, and clone the key when the bar turns pink.
- Drive fast to Randy's showroom so the tracker never pings the police.
- Follow Randy to his Wish List board.
Reward: $21,250, plus $10,000 if the car arrives undamaged. The Wish List cars are optional but needed for the Supply & Demand trophy.
Sinfrontera National Bank
Starts: Raul calls after Credit Check. Enter the bank in Tequesta by the front door.
- As Lucia, lean at a table with Jason.
- Use Focus to inspect the cameras, the man in the pink suit, the two guards and the panel between the elevators.
- Join Raul and Andrea upstairs.
Security Expert
Starts: straight after the bank, in Waning Sands.
- Drive slowly past the house, park, and follow Jason round the back.
- Slip in after the guard leaves and open the northeast bedroom door.
- Carry Nicole out close behind Jason, put her in the trunk and drive to the planning room in Stockyard.
Ride or Die
Goal: a Jason mission with Dre'Quan. The steps are not confirmed yet.
Company Property
Goal: a heist job with Brian. The steps are not confirmed yet.
The Missing Link
Goal: a Lucia mission with Andrea. The steps are not confirmed yet.
Safe Word
Goal: steal a practice safe. You use what you learn on the vault in the heist. The steps are not confirmed yet.
Cooties
Goal: a music video shoot, played as Lucia. The steps are not confirmed yet.
Bricked Up
Goal: a return to the apartment involving Boobie. The steps are not confirmed yet.
Hidden Charges
Goal: prepare the explosives that open the heist. The steps are not confirmed yet.
The Cartel Heist
Starts: once Hidden Charges and every other Chapter 3 main mission are done, Raul calls you to the planning room in Stockyard.
- Drive with Lucia and Nicole to the rigged cell towers downtown and detonate them. If all three go down, you have about 11 minutes before the police are free.
- On Karim's signal, knock out a marked guard and move everyone to the middle of the lobby.
- As Lucia, take Lex the guard to the security room and knock him out.
- As Jason, clear the guards, then the roof, and secure the backup terminal.
- As Lucia, open the vault: keep both drill bars lined up and steer the camera cable, which turns hard right, to the gold hook. Bag the big stacks first.
- As Jason, hold the second floor with a longer range gun and wait out the SWAT flashbang.
- Smoke the police cars with the launcher from the SWAT truck and head for the bus.
- Lead Nicole through the basement to the delivery bay and take the Brigade SWAT truck.
- As Lucia, defend the bus with the grenade launcher. Hit the helicopter when it sits behind you.
- As Jason, catch the bus, jump across from its left side and drive it down the freeway.
Reward: $120,000.
What opens up afterwards
After the final scene you can keep exploring Vice City or start Ocean Beach, the first mission of Chapter 4. Optional jobs such as Yasmani's jewelry jobs and Randy's Wish List stay worth doing. Race Against Yago is missable, and Pick Up Shayna reportedly is too, which is not confirmed yet.
FAQ
How many missions are in GTA 6 Chapter 3?
Our database counts 26 story missions in Chapter 3. Other lists range from 25 to 28 because they fold Tyrone into Here, Kitty Kitty or add short steps such as Send Money to Lorena and Heist Planning.
How much does The Cartel Heist pay?
The Cartel Heist pays $120,000. It only starts once Hidden Charges and every other Chapter 3 main mission are done.
What does Credit Check unlock?
Credit Check pays $6,000 and gives you the Dye Pack Jammer, which lets you take marked bills from banks and Payday Loans stores.
What can you miss in Chapter 3?
If you refuse to hand Halifax the statue in Dubious Provenance and never call him back, the rest of that mission disappears at the end of the chapter along with its loot. The optional Race Against Yago is also missable, and Pick Up Shayna reportedly is too, though that is not confirmed yet.
What comes after The Cartel Heist?
After the final scene you can keep exploring or start Ocean Beach, the first mission of Chapter 4.
Sources
- GTA 6 Story Missions Guide & Walkthrough, GTABase
- GTA 6 Full Walkthrough - All Missions, PowerPyx
- GTA 6 Walkthrough: All Chapters and Story Missions in Order, KeenGamer
- GTA 6 Welcome to Vice City Walkthrough, PowerPyx
- Welcome to Vice City | GTA 6 Mission Guide & Walkthrough, GTABase
- GTA 6 Dealer's Choice (Go See Dre'Quan) Walkthrough, PowerPyx
- Dealer's Choice | GTA 6 Mission Guide & Walkthrough, GTABase
- GTA 6 Meet the Heders Walkthrough, PowerPyx
- Meet the Heders | GTA 6 Mission Guide & Walkthrough, GTABase
- GTA 6 Dubious Provenance (Visit the Antique Store) Walkthrough, PowerPyx
- Dubious Provenance | GTA 6 Mission Guide & Walkthrough, GTABase
- GTA 6 Mami Knows Best (Catch Up With Mia) Walkthrough, PowerPyx
- Mami Knows Best | GTA 6 Mission Guide & Walkthrough, GTABase
- GTA 6 Here, Kitty Kitty (Speak with Tyrone) Walkthrough, PowerPyx
- Here, Kitty Kitty | GTA 6 Mission Guide & Walkthrough, GTABase
- GTA 6 Car Service (Steal The Car for Raul) Walkthrough, PowerPyx
- Car Service | GTA 6 Mission Guide & Walkthrough, GTABase
- GTA 6 Top Billing (Watch the Real Dimez) Walkthrough, PowerPyx
- Top Billing | GTA 6 Mission Guide & Walkthrough, GTABase
- GTA 6 Boobie Time (Talk to Boobie) Walkthrough, PowerPyx
- Boobie Time | GTA 6 Mission Guide & Walkthrough, GTABase
- GTA 6 First Impressions (Meeting with Raul) Walkthrough, PowerPyx
- First Impressions | GTA 6 Mission Guide & Walkthrough, GTABase
- GTA 6 Caught Slipping Walkthrough, PowerPyx
- Caught Slipping | GTA 6 Mission Guide & Walkthrough, GTABase
- GTA 6 Crosstown Traffic (Meet Raul) Walkthrough, PowerPyx
- Crosstown Traffic | GTA 6 Mission Guide & Walkthrough, GTABase
- GTA 6 Credit Check (Meet Raul's Crew) Walkthrough, PowerPyx
- Credit Check | GTA 6 Mission Guide & Walkthrough, GTABase
- GTA 6 Clonin' Keys, Makin' GS (Steal the Zorrusso for Randy) Walkthrough, PowerPyx
- Steal the Zorrusso for Randy | GTA 6 Mission Guide & Walkthrough, GTABase
- GTA 6 Sinfrontera National Bank (Scope Out the Bank) Walkthrough, PowerPyx
- Sinfrontera National Bank | GTA 6 Mission Guide & Walkthrough, GTABase
- GTA 6 Security Expert Walkthrough, PowerPyx
- Security Expert | GTA 6 Mission Guide & Walkthrough, GTABase
- GTA 6 The Cartel Heist Walkthrough, PowerPyx
- The Cartel Heist | GTA 6 Mission Guide & Walkthrough, GTABase
Checked against official sources on November 21, 2026. How we check facts
By the Respawndex editorial team.